Saturday, August 22, 2015

A 1946 Playsuit

1946 Bathing Suit 1

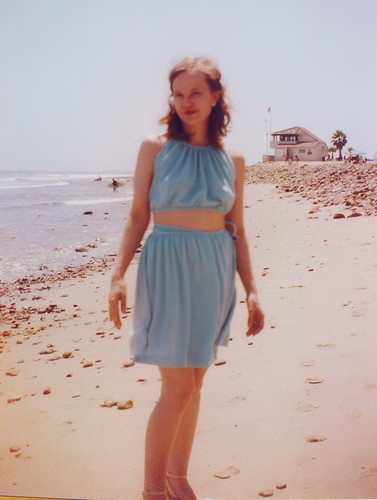
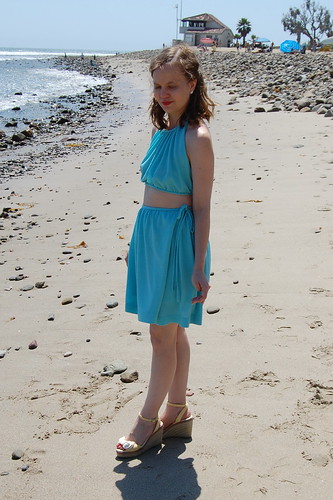
My 1946 playsuit in a picture taken by my 1919-1924 Brownie No. 2 Model E. It's based on this 1946 suit by Claire McCardell at the Met. It's made of wool jersey from Nature's Fabrics.

I made this in 2013 with plans to wear it to the hopeful pool party on Sunday at Costume College, but that didn't happen. I brought it in 2014 to wear to the beach, but that also didn't happen. I was quite happy to wear it to both the beach and Thursday night pool party at Costume College this year!

1946 Bathing Suit 2 1946 Bathing Suit 3

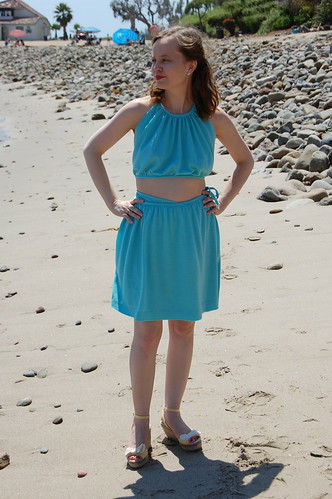
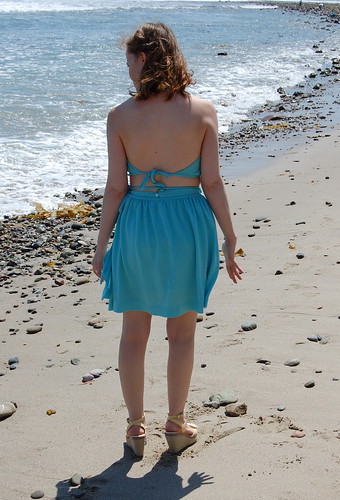
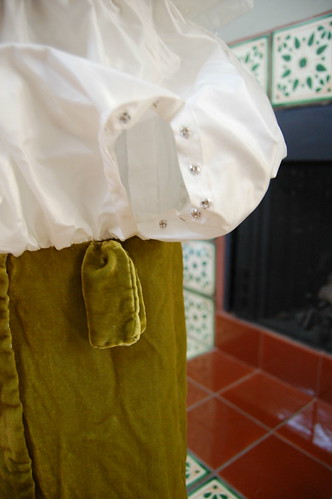
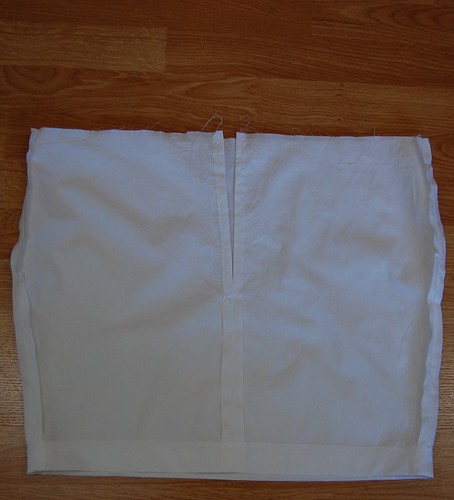
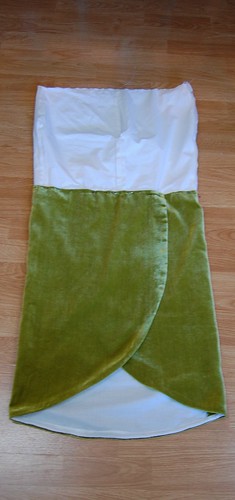
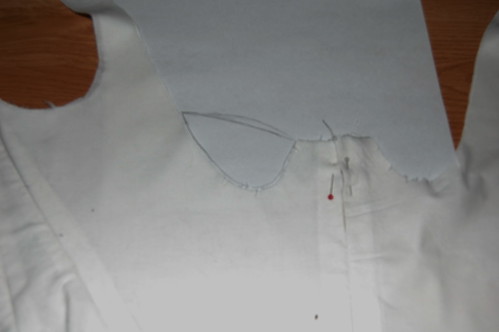
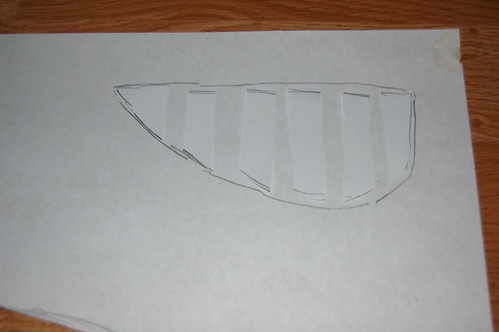
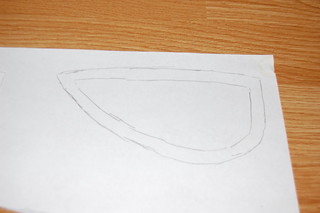
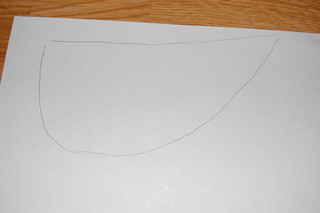
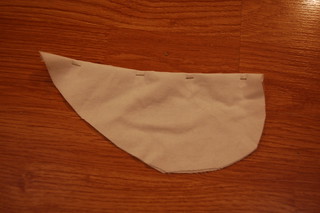
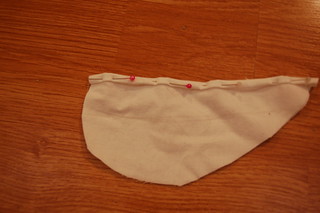
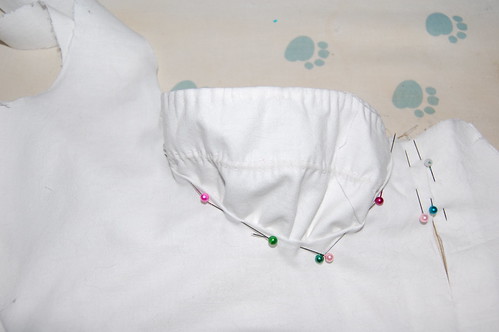
Construction was very straightforward. The top is a trapezoid with a slightly scooped neck that's gathered to self fabric ties. To pattern the top, I took a rectangle of muslin, folded the edges in a trapezoidal shape, gathered it to my neck and underbust, adjusted the width, and marked the curve of my neck. The skirt is a wrap skirt, and just a rectangle of fabric gathered to self ties. The underlap area isn't gathered so the skirt sits better.

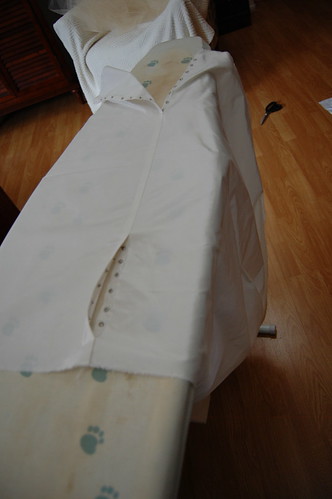
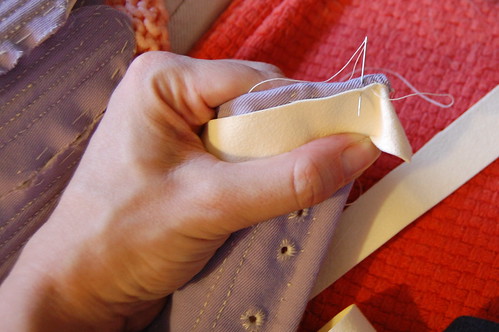
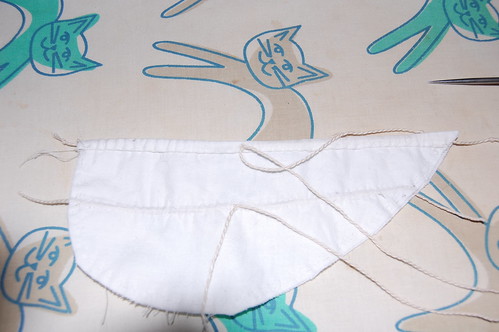
To attach the ties, I sewed them right side to right side using my machine's stretch stitch. I sewed the back by hand. I also sewed the ties shut by hand. I'm sure there's an efficient way to do this by machine, but I'm a good enough hand sewer that I found it easy to do this way.

I decided to make the top tie instead of button as in the original to make it easier to fit, and to, although I wasn't planning on wearing this for actual swimming, not have to worry about stretching if it got wet.

1946 Bathing Suit 4 1946 Bathing Suit 6

I made the shorts a year after making the skirt and top--fortunately Nature's Fabrics still had the seafoam green! Instead of making the slightly diaper like shorts of the original, I used the pattern for shorts from the vintage pattern I used for my first playsuit. The shorts close in back with a button and loop at the waist and snaps on the placket.

1946 Bathing Suit 8

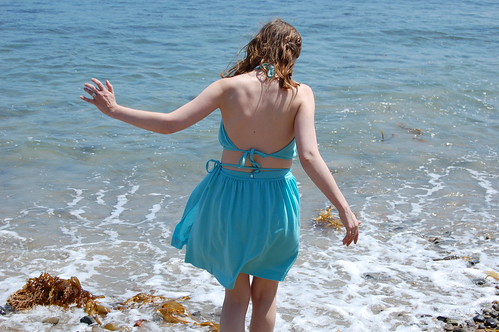
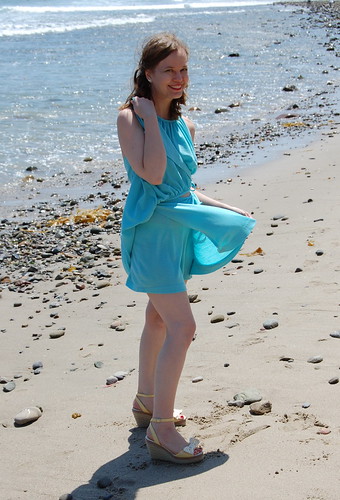
And though I didn't go very deep, I did wade into the ocean in this! A few waves tried to drench the skirt, but, being wool jersey, it repelled most of the water and dried quickly.

Wednesday, August 19, 2015

A 1913 Dress Based on a Photograph of Mata Hari

IMG_20150804_213733

Do you know those dresses that you see and instantly decide that you must have? That was my reaction when I saw this dress in a 1913 photograph of Mata Hari. I abandoned my Costume College gala plans and decided to make it. I'm so glad I did--it's a bizarre little dress and was so much fun to wear!

I used my bustle bodice pattern as a base, lowering the neckline and raising the waist. I draped the side pleats on my dressform. It closes at center front with a front panel covering that opening and snapping into place on the left. This is illustrated in this post.

DSC_0684 DSC_0685

The dress is made of silk taffeta from Pure Silks and my bandeau and the velvet for the skirt are from Thai Silks. The lining is the combed cotton broadcloth sheeting from Dharma Trading. The sleeve flounces are silk net.

IMG_20150804_214032 IMG_20150804_213500

My hair is based on this style, and though obviously smaller, I was quite pleased with how it turned out and wish it had photographed more true to life. I did realize though, that this particular style is just 1860s with a bandeau. My necklace is from The Littlest Sister on Etsy, and my earrings and bracelets are from Dames a la Mode on Etsy. My shoes are Capezio ballroom shoes with vintage shoe clips.

Closure and construction information can be found here. Although after my first dress with strange closures I thought I'd never make another one, I've really come to love making dresses with multiple closures. Figuring them out is quite satisfying, and I think they make rather lovely dresses with the hidden closures.


1913 Mata Hari Dress--Closures and Construction

The dress I made based on a 1913 picture of Mata Hari has rather interesting construction. I based it off period examples, and although 1910s dresses commonly closed in back, I decided that mine would close in front for ease of dressing.

DSC_0955 DSC_0956

Perspective with this dress is slightly odd. It never seems to look the same in pictures as it does in real life!

The dress opens at center front. The bodice is attached to a straight skirt that also opens at center front. It closes with hooks and eyes.

DSC_0958 DSC_0959

A panel of silk lined with cotton covers the closure and snaps into place on the left side.

DSC_0960 DSC_0963

The waistband of the bubble skirt closes separately on the left. The picture on the right shows a secret passage in the lower bubble skirt. I closed the bottom part of the seam with snaps, so a tailor's ham would fit through and you can iron it. A good thing, as it is looking a little worse for wear after Costume College!

DSC_0455 DSC_0456

The base skirt is shaped a little like a pencil skirt. It needed to be wide enough to fit comfortably over my hips and narrow enough for the wrap skirt and bubble to look good, so it tapers in. The waist measurement is wider than mine, and it's fit to the bodice with darts.

The base skirt is hemmed, and the raw edge of the wrap skirt is sewn on that. It doesn't matter that the wrap skirt edge is unfinished, as it's covered by the bubble skirt.

DSC_0457 DSC_0458

The bubble skirt is a giant tube with gathering stitches run at the bottom, middle, and top. The bottom seam is sewn for about an inch or two and then left open for a few inches that close with snaps so the finished skirt can be ironed. The bottom gathers are pulled to fit the base skirt, pinned on top of the velvet wrap skirt, and sewn into place.

DSC_0460 DSC_0461

The center line of gathering is pulled in and pinned along the marked line seen on the left. It's then sewn to that.

The top is gathered into its own waistband, and the base skirt is sewn to the waistband bodice.

Though it is quite intricate, the multiple closures are worth it to get these complicated styles.

Faking a Regency Cap--A Tiny Tutorial

DSC_0904 DSC_0905

I will happily admit this is not a completely accurate Regency cap. As I was sitting and looking at the strips of fabric that I was thinking about turning into a cap pattern, I realized I could go about it an easier way--I could use my Kannik's Korner cap pattern and add a few Regency elements. Some had ruffles across the crown, others had ruffles facing back, early fashion plates had colorful ribbon, (I'm obviously using the extended stylistic definition of Regency here), and a feature many of them had was the front ruffle extended around the back of the neck.

My cap is made of Swiss muslin and trimmed with Swiss embroidered edging, both from Farmhouse Fabrics. The ribbon is from Silky Way on eBay.

IMG_20150607_160138228_HDR IMG_20150607_160148655_HDR

To make my cap, I used the girl's band and woman's caul, like I have in my previous Kannik's Korner caps. I followed the directions with the pattern. After attaching the band and caul, I whip gathered a piece of the embroidered edging, and sewed it across the back crown of the cap. Then I sewed another whip gathered piece of edging to the back of the band, facing backwards. I then tried the cap on and pulled the drawstring to about where I wanted to wear it. I then took another piece of whip gathered edging and sewed it around the entire edge of the cap, including the gathered portion. Then I added ribbon, which I just played with until I liked the look of it.

IMG_20150607_160154987

And there it is, a very silly, frilly cap!

Binding 18th Century Stays--An Abbreivated Tutorial

After writing my 1780s stays tutorial, I realized that there was one part that was probably more helpful than anything else--binding the stays. I don't take credit for this binding method, rather Nicole, of Diary of a Mantua Maker told me about it, and I was later lucky enough to see it done on extant 18th century stays in Lara Corset's collection.

If you've ever wondered how 18th century stays had such a narrow binding, this is how. Instead of cutting all layers to the edge and binding, a seam allowance was left on the top layer of the stays, which was then wrapped to the wrong side and hemmed, essentially binding the stays before adding the binding.

Purple Stays 3

Here's the seam allowance on the top of the stays. Right now, it's all layers of the fabric. Inserting the boning is much easier this way.

Purple Stays 4

Only the inner layers of the stays are cut. The top layer seam allowance is left in place.

Sew the panels of the stays together. No need to do it by hand like I did, unless you're like me and actually think it's fun to hand sew stays!

Purple Stays 11

Once the panels are sewn together, fold the excess seam allowance to the wrong side and hem it to the lining.

Purple Stays 10

Here it is from the right side. Now, when you bind the stays, you're not doing it to finish the edge because it's already finished, but rather binding to finish the edge more nicely and provide a little extra strength at the seams.

Purple Stays 15

Bind the stays however you like. I used ultrasuede (also on Nicole's recommendation!). I'm afraid to get the truly narrow binding though, it does have to be done by hand. You want to catch the top of the hem more than anything else.

DSC_9323

And nice, tiny binding, just like real 18th century stays!

Tuesday, August 18, 2015

1790s Transitional Stays

transitional_stays1 transitional_stays5 transitional_stays3

I've needed a new set of early Regency stays for a while. I have 1820s or so stays that I love, but my early stays stretched beyond wearability.

I have a detailed post about making these stays here. The short version--they're based on stays in the V&A and use the 1790 Linen Stays pattern from Corset by Jill Salen as a base. They're cotton broadcloth lined with cotton twill.

transitional_stays6 transitional_stays8

These stays are extremely comfortable--even if I did manage to tie the straps at different lengths and the center front bow came untied, and a tab flipped up for these pictures :)

1790s Transitional Stays--A Tutorial

transitional_stays7

My main inspiration for these stays was this pair of stays in the Victoria and Albert Museum. Mine are slightly simpler, but keep the elements I wanted. Separate cups, higher waist, and general 18th century cut. I used the 1790 linen stays pattern from Corsets by Jill Salen as a starting point since they had the general shape I wanted. I changed them to back lacing with false front lacing and gathered cups. They're made of two layers of fabric, cotton broadcloth for the outer layer and cotton twill for the inner layer. Both fabrics are from Fabric.com. They're boned with metal and plastic artificial whalebone. I used the plastic in the diagonal channels so I could easily shape the end of the bone to fit. They're bound in tight weave cotton ribbon that I bleached white. They're laced with silk ribbon from Farmhouse Fabrics. The cups are drawn in with twisted cotton crochet cord.

DSC_9867

Basic construction is straightforward. All seam allowances are turned in towards each other--so they're on the inside--and the pieces are whipstitched together. This is based on early 18th century stays construction, but since the seam allowances are inside, there's no need for a separate lining to cover seam allowances.

To pattern the shaping for the cups, I fit the stays normally, adjusted my bust into the position I wanted it held, and drew a line underneath that. I smoothed out the line when I took the mockup off.

DSC_9868a

To pattern the cups, I traced the shape of the cup onto paper.

DSC_9869a

I then cut that shape into strips, spread it out, and traced around that.

DSC_9870 DSC_9871

I added a seam allowance on all sides--to sew to the stays and to put a drawstring channel in the top--and adjusted the top line so it would make a smooth line with the straps.

DSC_9913 DSC_9914

The cups are two layers of broadcloth. The top is hemmed to make a drawstring channel. The line drawn in the center of the cup is to create a drawstring channel for the center of the cup.

DSC_9915

Here it is sewn--there are no eyelets for the twisted crochet cord drawstrings; they're just poked through the fabric.

DSC_9916

The seam allowance under the cup is folded down, and the cup is topstitched in. I used a spaced backstitch.

DSC_9917

The lining is left loose. The curve is clipped a little to make the seam allowance fold more easily.

DSC_9918

The seam allowance folded down, and is whipstitched to the wrong side of the cup.

I did a second row of spaced backstitching after the lining was whipstitched down. This wasn't completely necessary, but it made it feel more finished.

DSC_0871

The tabs are cut, boning is added, eyelets are sewn, they're bound, and they're done!

DSC_0872

Here they are from the back, which because of the techniques used, looks an awful lot like the front...