Sunday, December 31, 2017

Princess Leia's Bespin Costume--If Star Wars Took Place Around 1800...

Jae-16

For Costume College 2016, Jen Thompson had a fabulous idea--historical versions of Star Wars costumes. I wanted to participate, and was thinking of what to do, when on the way to the Jane Austen Evening (perfect!), the idea of Leia's bespin costume as Regency popped into my head. After all, if you look at it, it practically is 1790s with its overdress, and, well, overdress. Definitely workable, and daydreaming made the trip so much better.

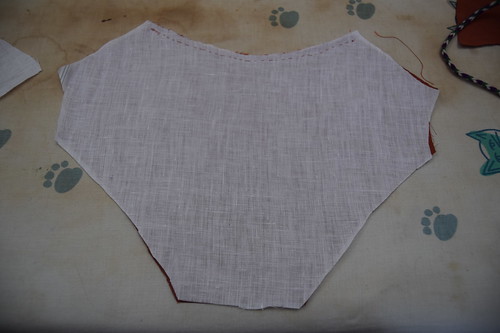
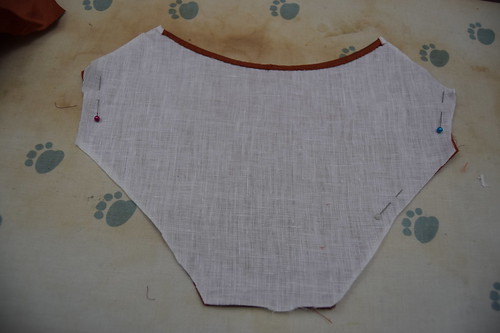
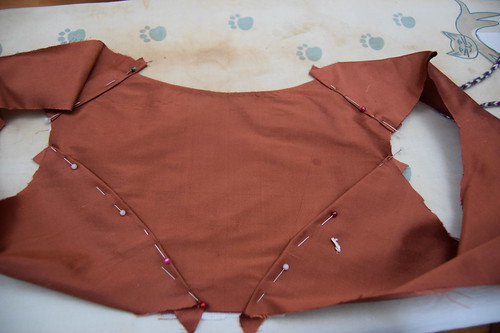
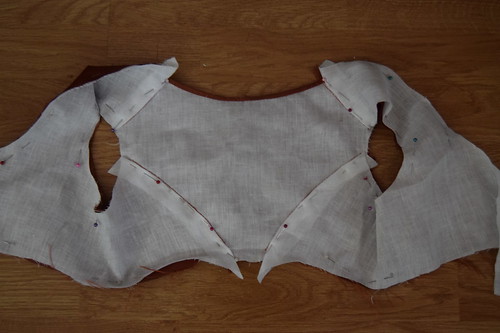
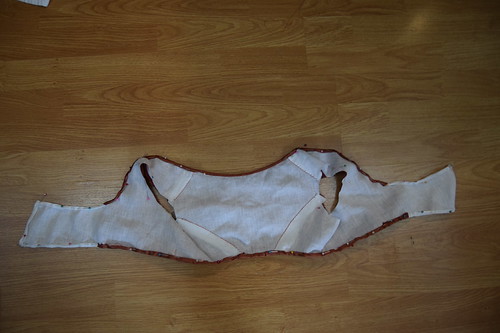
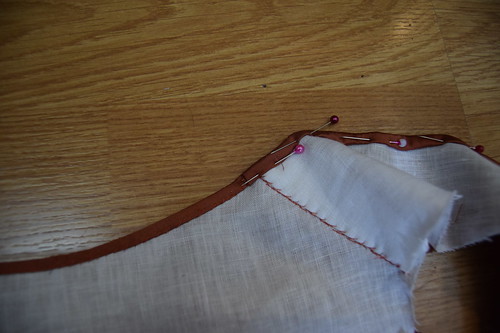
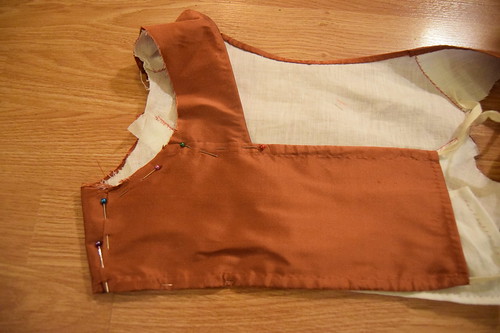
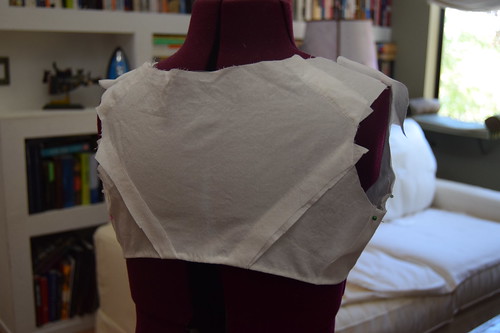
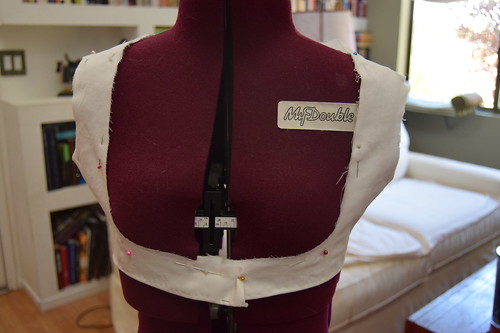
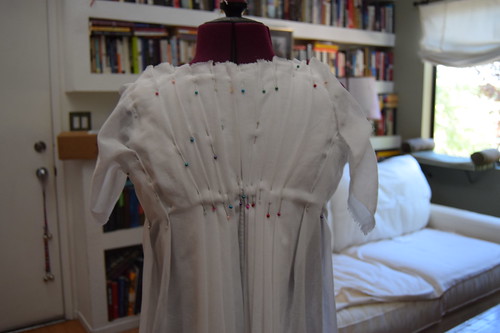
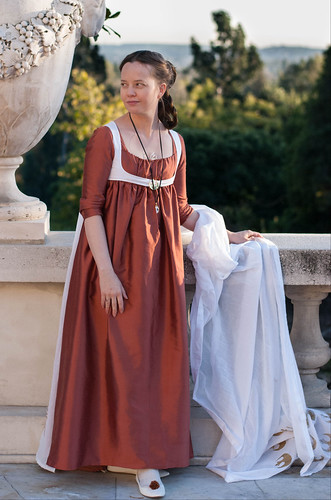
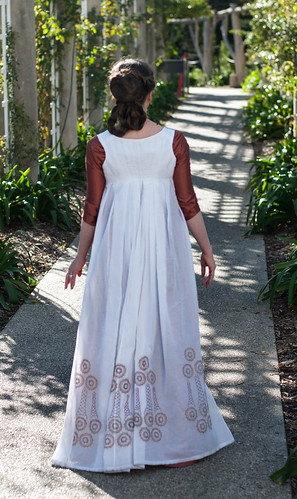
My idea for this dress was to make a dress that would fit into the Regency period, yet be recognizable as Leia's costume as well. To do this, I made a typical c. 1800 round gown, with a sleeveless overdress based on period overdresses. Dresses with paisley borders--made from shawls or in imitation of shawls--were popular, and I decided to imitate that look by embroidering just the hem of the overdress instead of continuing it up the whole back of the dress. The back of the overdress is pleated--like many original dresses, and as a nod to the collar of the movie costume. I considered putting a collar on the back of the overdress, which was seen on originals, but I decided I liked the pleated look too much to cover it.


Jae-42 Jae-46

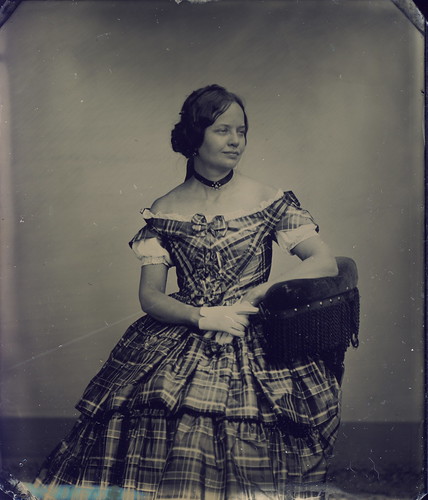
In addition to wearing this to Costume College, I wore it to tea at the Huntington before the 2017 Jane Austen Evening. Once again, I was so lucky to have pictures taken by my friend, Llyra Lee. I couldn't have made the dress without help from my friend Maggie who made a beautiful version of the dress, and helped with my embroidery design.

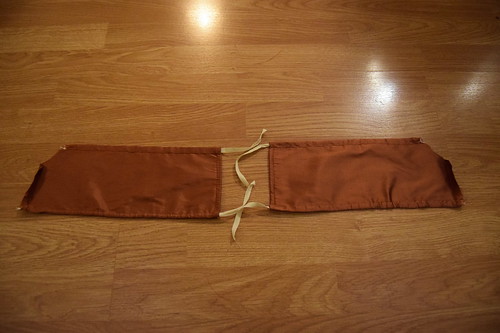
Construction information for the dress can be found here, including some details from my visit to the Fashion Museum in Bath earlier in the year. My journal for the dress is here, and details most of my thoughts as I made it. The silk taffeta is from Fabric Mart, the voile from Farmhouse Fabrics, and the linen lining is from Burnley and Trowbridge.

Jae-18

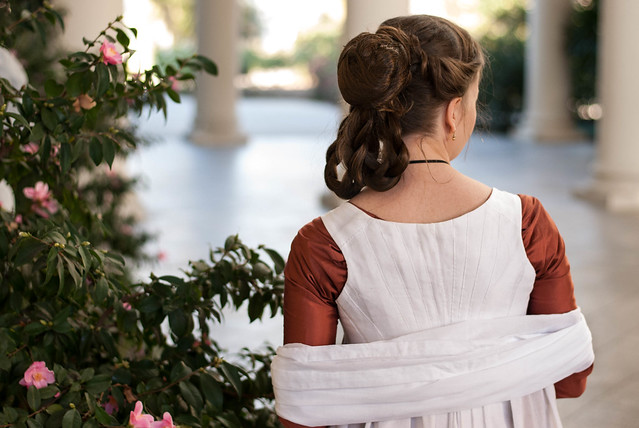
The pleated back of the dress is one width of fabric, neck to hem. It's pleated to fit the linen lining. The bun and braids is a hairpiece. To make it, I took two long pieces of braiding hair, braided the center, leaving the ends loose, looped the braids, attached them to each other, and made a bun from the loose hair. I then covered the bun with an invisible hairnet which I sewed over it to keep everything into place. From there, I just pinned it on.


Jae-15 IMG_20160710_194919963

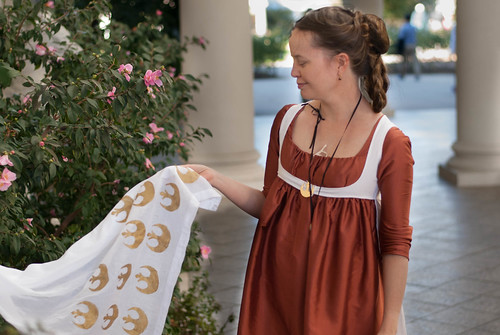
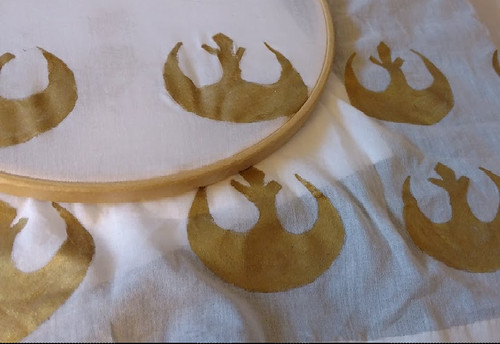
My shawl is made of three yards of voile from Dharma Trading. I used a Rebel Alliance stencil from CeeCeesSpecialties on Etsy for the pattern, which I painted with gold Lumiere Fabric paint and DecoArt SoSoft Fine Glitter. I traced the design on and then put it in an embroidery hoop to stabilize it as I painted it.


DSC_1987 712689_600

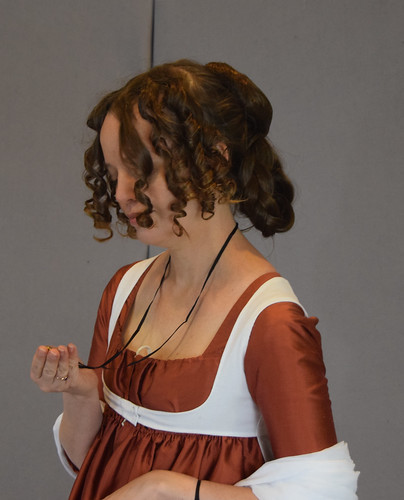
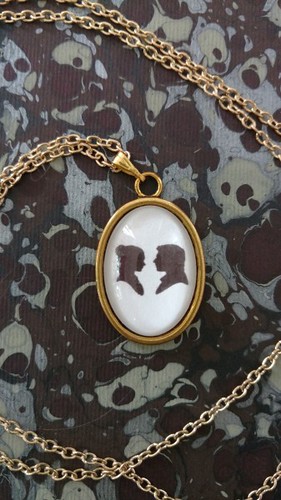
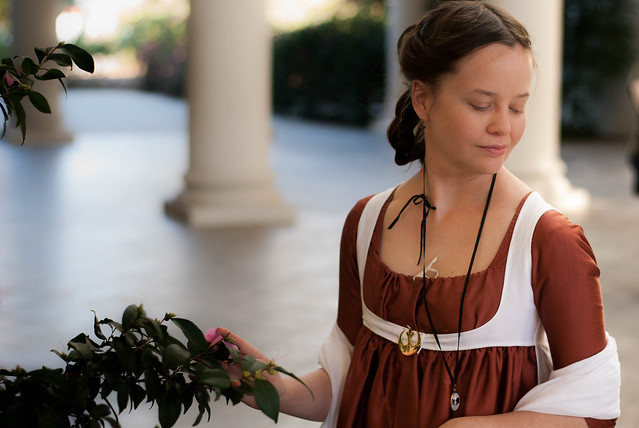
The pendant I wore with the dress--a silhouette of Han and Leia--was made by CrystallineFairy on Etsy. The Rebel Alliance pin that can be seen in the pictures from the Huntington (I forgot to bring it to Costume College) is from the 1997 rerelease. I bought it on eBay.

DSC_2066 IMG_20160713_175123749

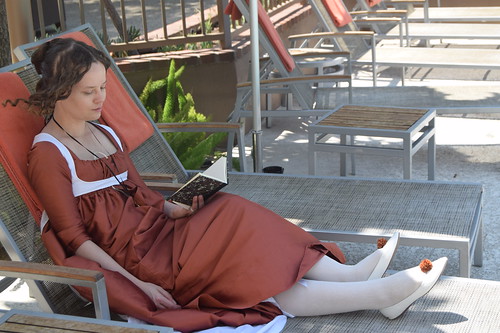
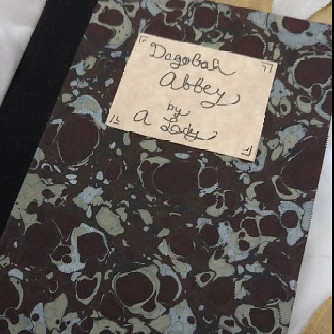
With the novel reading heroines of the Regency in mind, I decided I needed a book as a prop. I bought a small book from VersLibris on Etsy and added a title plate for Dagobah Abbey using double sided tape.

DSC_2036 IMG_20160721_171751594

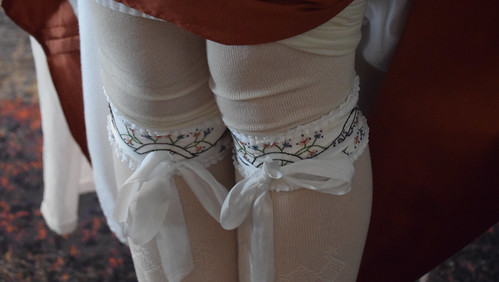
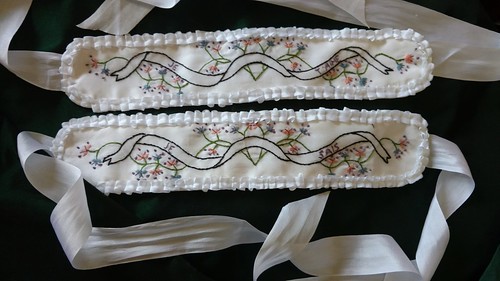
The garters are based on a pair in the Victoria and Albert Museum. They say Je T'aime and Je Sais (I love you, I know). They're silk, interlined with cotton flannel, embroidered with Au Ver Au Soie embroidery thread, and trimmed with China silk ribbon from Silky Way.


DSC_1992 IMG_20160704_200828603

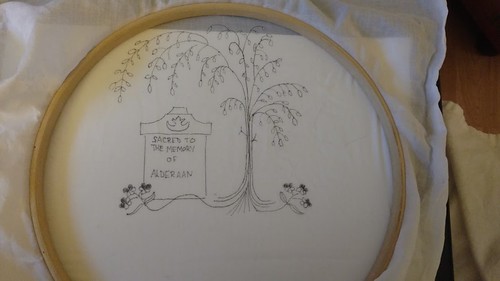
My reticule is based on early 19th century inked bags. I browsed through memorial art until I found a design that I could reasonably imitate with my drawing skills, and dedicated it to the memory of Alderaan.

IMG_20160709_163302318 IMG_20160709_145839970

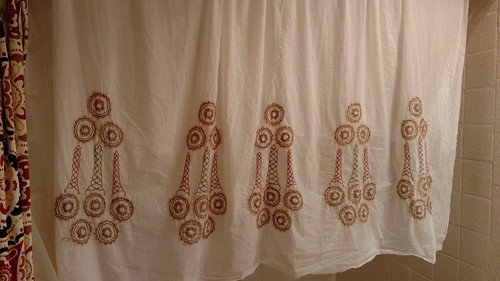
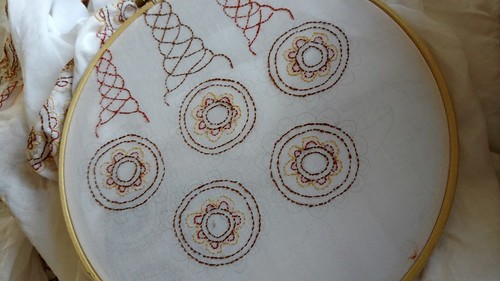
The embroidery is done with wool from my local embroidery store. It's all done in back stitch.

713676_600 Jae-26

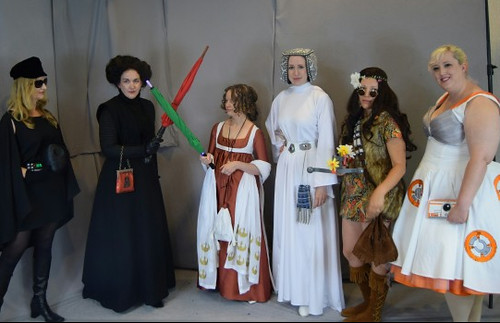
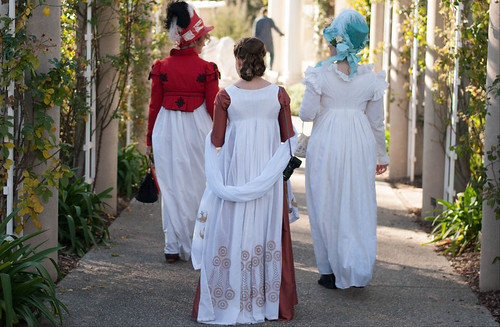
And worn with two different groups--our Star Wars historical group at Costume College, and our Regency group at the Huntington--I think it fits in nicely with both!

Regency Leia Bodice and Pleated Open Robe--Some Construction

My Regency Leia dress was the first dress I made after I was lucky enough to study some late 1790s/early 1800s dresses in person at the Fashion Museum in Bath. I used a few of those techniques on this dress. A little ironic considering the fantasy origin of the dress, but, being me, I did want to make it as accurate as possible--even if the embroidery pattern may have been a bit strange to early 19th century eyes!

The completed dress can be seen here.

DSC_1794 DSC_1796

The dress is made of silk taffeta with a linen lining.

The first step was to baste the center back neckline lining to the silk. Then, the two layers were turned under and hemmed.

Many of the extant dresses we looked at had a row of large stitches on the back neckline. We wondered about the purpose. When I made this dress, it became obvious--it was much easier to neatly hem the curve of the neckline without the fabrics shifting when it was basted. And since it doesn't show, there's no reason to take the basting out.


DSC_1797 DSC_1798

After the center back is done, the seam allowances on the silk fronts are folded under, and sewn to the back. The seams are sewn where the pins are. Although in the past I've sewn lapped seams very close to the fold, many of the dresses we studied had seams sewn a little ways in from the fold, which gave the seams a defined look.

After the silk is sewn, the lining is inserted. The seam allowances were folded under and whipstitched in.

DSC_1799 DSC_1800

Once the lining is done, the edges of the bodice are hemmed. The hem starts at the side back, around the strap, down the neckline, the center front flap, the bottom edge of the bodice, and continues until the other shoulder strap.

The silk doesn't extend all the way over the center front flaps--only to where it's going to be covered by the center front gathered panels.

Although a bodice of this shape could easily be hemmed without hemming the center back first, doing it this way would work very well for a more square shaped back, where there's no slope between the center back and the back straps.

DSC_1801 DSC_1802

The center front gathered panels are just rectangular strips that are hemmed at the top and bottom for drawstrings with a curve cut out for the armscye. The seam allowance at the side seam is turned over and topstitched to the bodice. The top of the panel is sewn to the shoulder strap where it's pinned.

The sleeves are then set normally. The skirt is a slightly gored tube that opens at center front. I cartridge pleated it and sewed it to the bottom edge of the bodice, being careful to not catch the drawstring. The front panel is slightly gathered with most of the gathers being concentrated in back.

Most dresses I've seen from this time have the center back of the skirt mounted about an inch or so above the back waist and sewn right side to right side, which makes it stand out a bit, but I chose not to do this on this dress because I wanted a flatter line under my overdress.

DSC_1804 DSC_1805

The overdress is cotton voile lined with linen. I completed the bodice except for the top hem and securing the voile layer on the shoulder straps.

DSC_1806

The back is one rectangular panel from neck to hem. It's really quite simple--the panel is pinned at the center front and sides, and then pleated until everything is pleated and it looks nice. I have an inverted box pleat at the center back with all the other pleats facing it.

All the pleats are sewn down and trimmed. The center back neckline was finished with a strip of fabric that was turned to the inside and hemmed. The front neckline was turned under and hemmed. The sleeves were finished with strips of voile on the bias and hemmed.

The center front is pinned shut--and worn with a Rebel Alliance pin, of course :)

Jae-18

Wednesday, November 22, 2017

Tintype Photography, Or A Photographic Trip to the Past

2017g4 IMG_20171118_214516

A group of friends and I went to Gettysburg for Remembrance Day, where we spent most of our time at the fabulous Victorian Photography Studio. We also visited in 2015, but the new owner encourages social media and digital photography, which made the experience even more interesting as it was possible to take detailed comparison pictures in the same environment.

The above pictures were taken at nighttime, between dinner and the second half of the ball (yes, a few of us missed half the ball to have a few more tintypes made!). In period, photographers were dependent on daylight, but thankfully the studio has an excellent daylight mimicking light setup. All of the color pictures were taken with our cell phones and haven't been touched up, just cropped to help the comparisons a bit.

The ball gown I'm wearing is one of my older dresses. I made the skirt in 2007 and the bodice in 2010. I think the color shift in the wet plate was the most interesting of my dresses. The green in my skirt has quite a bit of yellow in it--it's shot with one of the threads a goldish color--and it darkened noticeably.

2017g10 FB_IMG_1510956026356


I love that we had such a variety of fabrics and patterns in our group shots. Some of our dresses shifted in expected ways--however, Leia's dress has a striking contrast of rust and chartreuse in real life, but faded into one color. Taylor's blue dress lightened considerably and the contrast with the black trim is even more pronounced than in reality. Adrienne's dress has lost definition in the check and appears more like a stripe.

My dress, Robin's wrapper, Alice's dress, and Amanda's dresses look more like what you'd expect in black and white photography with the contrast in colors remaining consistent with reality.


2017g7FB_IMG_1511277798759

In our second group shot, I think the most striking change is the lightening of blues--and Leia's plaid looking like a stripe.


2017g2 23847855_10101636152010189_959287820_o

For this dress, I copied a period photograph and tried to get the details as close as possible to the original. Though it's impossible to know, I'm glad that the colors I chose had similar contrast to the original. The ribbon on my dress is strips of white and black shot taffeta with fringed edges, which reads as grey. The center is a bit darker than the original, though the darkness of the soft edges is similar. The eyelets in my collar stand out a little more in the tintype. Please note, I took my rings off in between the pictures--they didn't disappear!


2017g9 IMG_20171117_125729

This pose is inspired by an original photograph. Though portraits are the most common, many photographs also showed people doing activities--or at least pretending to!


2017g3 IMG_20171118_115435

Even though I brought my paletot, I didn't expect to take a tintype with it. Saturday though, it was pouring rain, so wearing it with my silk dress was a necessity. I couldn't resist finding out what the soutache trim would look like, and I wasn't disappointed. Though the purple and black contrast well, it's even more defined in the tintype.


2017g8 IMG_20171118_114315

Many photographs featured knitting, and since I not just love period knitting, but have a knitted bag in progress, I decided that I needed to recreate such a scene. This photograph was my main inspiration, though I decided to pose with more knitting instead of a book. I've included two miser's purses, princess royal scarf, Robin's pineapple, and Adrienne's pence jug.

The white brooch on my chest isn't actually white--it's a miniature of President Obama that I made for a reenactment just before the 2008 election. It has a glass covering, which reflected the light so you couldn't see the picture--his official senate picture. I do wish it had shown up!


23847814_10101636152065079_26515139_o 38478070086_ab54c9d418_o

Looking through the camera was fascinating! In addition to the photograph being flipped, the image is upside down.


24662058708_f5f9fdf467_o 38502180652_e1cc325a44_o

The camera is positioned a good distance away. All of our pictures with our phones were taken much closer, yet had similar or wider angles. The exposure time was 15 seconds, half of the 30 seconds of our previous session in 2015. Though this wasn't a very long time to sit, having the head clamp was very useful. Breathing and blinking are fine during the process.


IMG_20171117_125127 IMG_20171117_125149

Setting up the yarn winding shot--getting in good distance of the camera, and head support hidden behind me.


IMG_20171118_114138_1 IMG_20171118_114414

Setting up the table of knitting--trying to make everything look as natural and distinct as possible. I left off the talma wrap and mariposa hood that I also brought on the trip. And once again, having the head clamp positioned. It's really quite comfortable--your neck just rests on it.


2017g1 2017g6

Two of the tintypes in cases--I think they really add to the authentic look!

If you ever have the chance to have a tintype made, do it! It's really an amazing experience and helps to imagine what people in the past experienced. The picture emerging is fascinating to us--just think what it would've been like 150 years ago! And I couldn't recommend the Victorian Photography Studio more. They were professional, friendly, took beautiful photographs, and even had delicious cinnamon rolls. What more could you ask for!


And speaking of the photographs emerging, below are videos of the developing process. They start as negatives, and then all is revealed!

VID_20171117_122020 from Katherine on Vimeo.


VID_20171117_130032 from Katherine on Vimeo.


VID_20171118_112635 from Katherine on Vimeo.


VID_20171118_114955 from Katherine on Vimeo.


VID_20171118_120121 from Katherine on Vimeo.


VID_20171118_215427 from Katherine on Vimeo.